Introduction
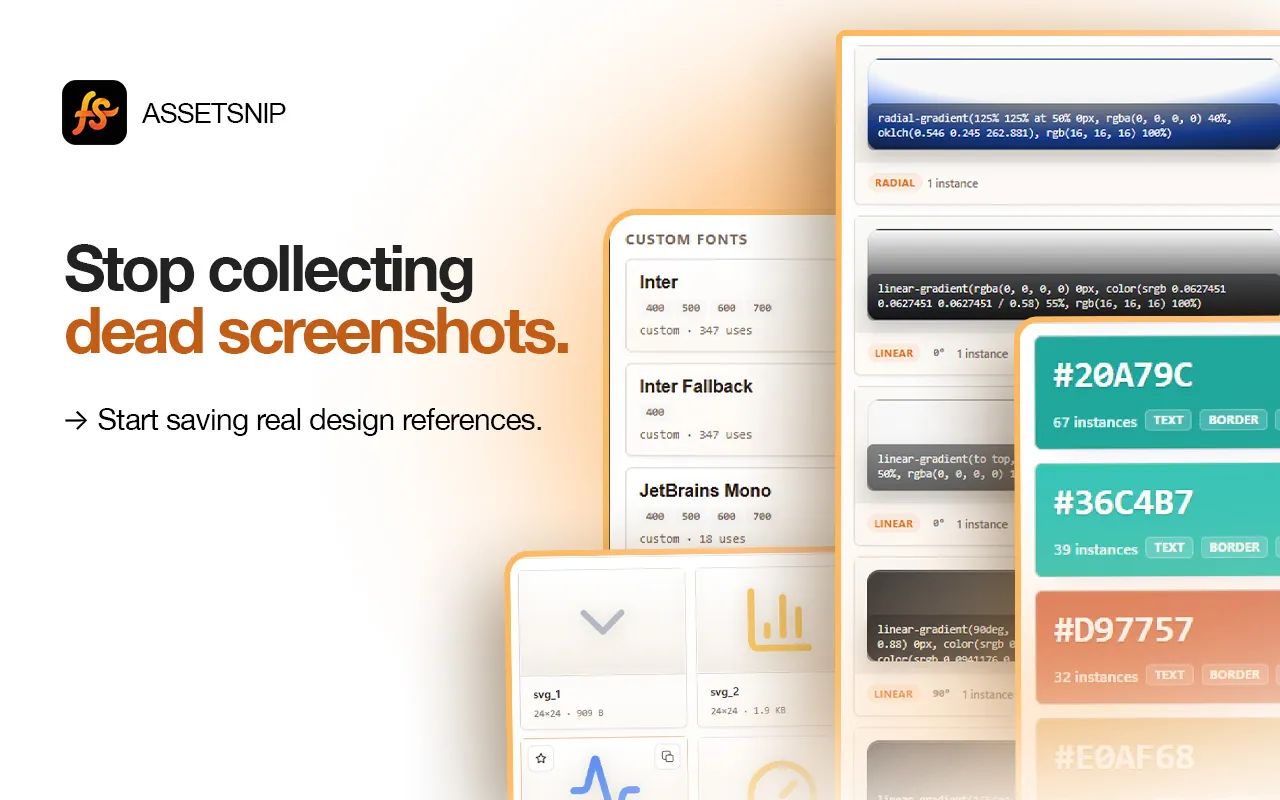
If you have ever explored a website for design inspiration, you have probably opened DevTools to find colors, check fonts, inspect layouts, or save SVGs and images. It is a common approach, but it can become time-consuming when you need to collect multiple assets and keep everything organized.
A website design system includes much more than its visual appearance. It brings together colors, typography, media assets, motion, and reusable interface patterns that create a consistent experience.
In this article, we will look at what makes up a website design system, why manual inspection can be challenging, and how AssetSnip helps simplify the process of capturing and organizing design assets from live websites.
What is a website design system?
A website design system is a collection of reusable elements that help maintain a consistent look and feel across a website or product. Instead of designing every page from scratch, teams rely on shared visual styles, assets, and interface patterns that can be used repeatedly.
This makes it easier to create a uniform user experience and simplifies both design and development workflows. While every project is different, most website design systems are built around a few essential parts.
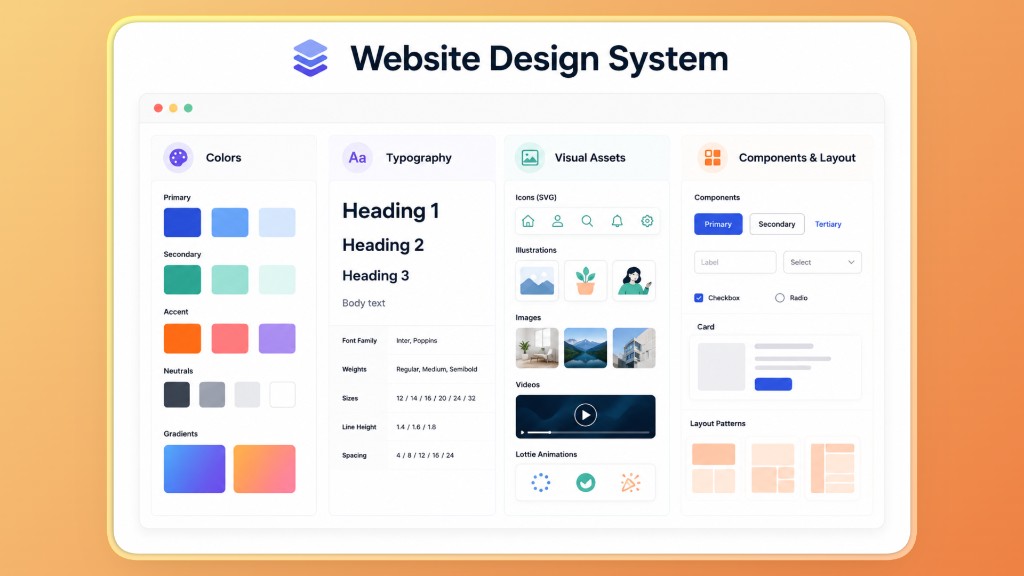
Colors
Colors play an important role in creating a consistent visual identity. A website design system usually includes primary and secondary colors, accent colors, and background or surface colors that are used across different pages and interface elements. Many modern websites also use gradients to add depth and highlight important sections.
Defining these values in one place helps maintain consistency and reduces the chances of using slightly different shades across the same website. A well-organized color system also makes it easier to understand the visual structure of an interface and create a more predictable user experience.
Typography
Typography defines how text appears across a website and helps create a clear visual hierarchy. A design system generally includes font families, font weights, font sizes, line height, and spacing rules for different types of content. Headings, paragraphs, navigation menus, buttons, and labels often follow predefined text styles to maintain consistency.
Using the same typography rules throughout a website improves readability and gives the interface a more polished appearance. It also helps maintain a uniform style when new pages or sections are added in the future. If typography is your main research goal, AssetSnip also has a focused workflow for finding fonts used on a website.
Visual assets
Visual assets include the graphics and media elements that support a website's interface and branding. Common examples include SVG icons, images, videos, and Lottie animation files. These assets are often reused across multiple pages and sections, making consistency important.
Managing them as part of a design system helps maintain a uniform visual style and reduces the need to search for files stored in different locations. Keeping reusable assets organized also makes it easier to reference existing resources when creating new pages or updating current designs.
Components and layout
Components are reusable interface elements that appear throughout a website. Buttons, cards, navigation menus, forms, and other UI blocks are common examples. A design system also includes layout patterns that define how these elements are arranged on a page.
Reusing the same components and structures helps create a familiar experience for visitors because similar actions and content follow the same visual pattern. It also reduces the need to redesign common interface elements every time a new page or section is created.
Why designers and developers inspect existing websites
Studying existing websites is a common part of both design and frontend workflows. Looking at live interfaces helps you understand how visual elements are organized and provides useful references for future projects.
Here are some of the most common reasons designers and developers inspect existing websites:
- Inspiration and research: Designers explore websites to understand how different interfaces present content and guide user interactions. Studying layouts, navigation patterns, and visual hierarchy can provide ideas for future designs without copying an entire interface.
- Design consistency: Inspecting a website makes it easier to study color palettes, typography styles, spacing, and other visual patterns. Understanding how these elements work together helps create interfaces that maintain a consistent appearance across different pages.
- Frontend learning: Live websites are useful for understanding how interface components are structured and styled. Looking at buttons, cards, navigation menus, and other UI elements can help developers study common frontend patterns.
- Project planning: Before starting a new website or redesigning an existing one, collecting references can help define the overall visual direction. Saving examples of layouts, colors, typography, and reusable components makes it easier to organize ideas.
The challenges of using DevTools for design research
DevTools is useful for inspecting websites, but collecting and organizing design assets often involves multiple manual steps. When working with several references, the process can become difficult to manage.
Common challenges include:
- Finding information across multiple panels: Colors, typography details, images, and other assets are often located in different sections, requiring users to switch between multiple tabs and tools.
- Manual copying: Color values, font properties, and other design details usually need to be copied one item at a time, which can be repetitive.
- Screenshot overload: Saving screenshots for reference is common, but large collections can quickly become difficult to organize and search.
- Asset management problems: Images, SVG files, videos, and other resources may end up stored in different folders or locations, making them harder to track.
- No centralized library: Collected references often remain scattered across screenshots, downloads, and notes instead of being stored in a single, organized place.
What assets should you capture from a website?
A website contains many reusable assets that can serve as valuable references for future design and development work. Instead of collecting random screenshots, it is more useful to capture the elements that define the website's visual identity and interface structure.
Focus on the assets that explain how the interface is built:
- Colors and gradients: Capture HEX, RGB, HSL, and gradient values so you can understand the website's palette and maintain visual consistency in future projects.
- Typography: Save font families, font sizes, font weights, and text styling details to study the website's hierarchy and readability patterns.
- Images and SVGs: Collect reusable graphics, icons, logos, and visual references that support the interface.
- Video and motion assets: Capture embedded videos and Lottie animation files to understand how motion is used in the experience.
- UI sections: Save component structures, layout references, and reusable interface patterns so you can study how elements are organized across the website.
For a more direct extraction workflow, you can also read the dedicated guide to extracting assets from a website.
Building a better design research workflow
A structured workflow makes design research easier to manage and reduces the need to repeat the same tasks for every project.
Instead of collecting random screenshots and scattered notes, it is better to follow a simple process that keeps important assets organized and ready for future use.
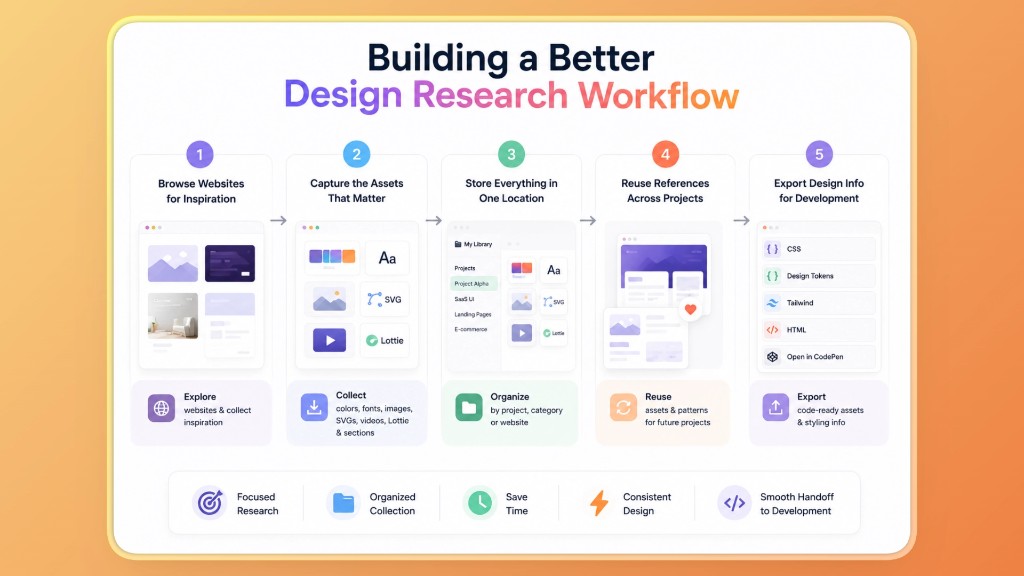
Step 1: Browse websites for inspiration
Start by exploring websites that match your project goals. Pay attention to their color palettes, typography, layouts, navigation patterns, icons, and other interface elements. The objective is not to copy a design but to understand how different visual components work together.
Step 2: Capture the assets that matter
Once you find useful references, collect the assets that define the website's design system. This can include colors, gradients, fonts, images, SVGs, videos, Lottie files, and reusable interface sections. Capturing only the most relevant assets keeps your research focused and easier to manage.
Step 3: Store everything in one organized location
Keeping assets in a single location makes them easier to find later. Organizing references by project, category, or website can help avoid duplicate files and reduce the need to search through multiple folders and screenshots.
Step 4: Reuse references across future projects
Many visual elements and interface patterns can be useful beyond a single project. Having an organized collection of design references allows you to revisit colors, typography styles, media assets, and layout ideas whenever needed.
Step 5: Export design information for development
As a project moves into development, design references often need to be converted into code-ready values. Exporting styling information and reusable assets helps create a smoother transition between design research and frontend implementation.
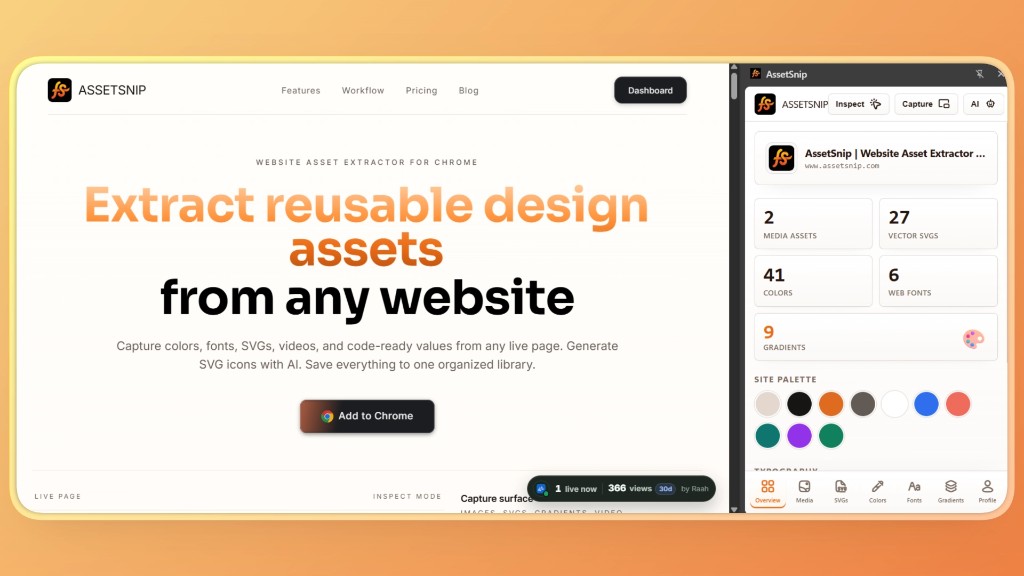
How AssetSnip helps simplify the process
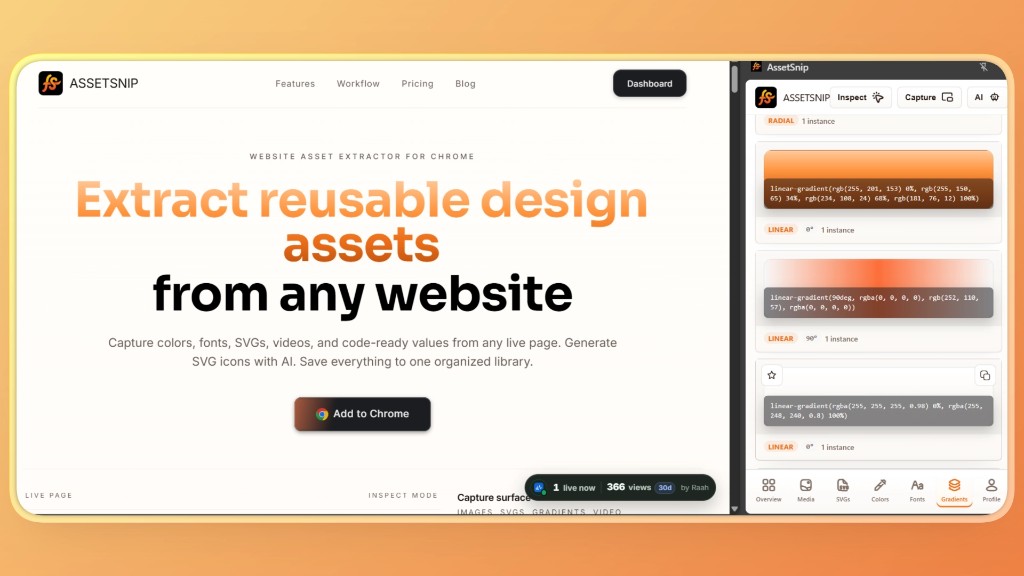
AssetSnip is a website asset extractor for Chrome that helps users capture reusable design assets from live web pages. It allows designers and developers to collect colors, fonts, SVGs, images, videos, Lottie files, and code-related information, then save everything in one organized library for future reference and export.
Here is how it simplifies your process.
Get an instant overview of any website
When AssetSnip scans a website, it generates a structured overview of the assets found on the page. Users can quickly see available media assets, SVGs, colors, fonts, and gradients without manually inspecting the website.
The extension also displays the site's color palette, making it easier to understand the visual system behind a design. This provides a useful starting point for research before diving deeper into individual assets.
Inspect live sections
One of the core features of AssetSnip is Inspect Mode. Instead of manually searching through different DevTools panels, users can inspect specific sections, cards, buttons, images, or layouts directly on a live website.
AssetSnip can capture HTML, CSS, Tailwind-friendly output, color information, and typography details from the selected section. Once an element is selected, users can review the extracted structure and export it in the format they need. This makes it easier to understand how a particular section is built without manually locating information across multiple browser tools.
Capture design assets directly
Websites contain many reusable assets that are valuable during design research. AssetSnip allows users to collect images, SVGs, videos, Lottie files, colors, gradients, and font information directly from public pages.
The extension organizes these assets into dedicated sections, including Media, SVGs, Colors, Fonts, and Gradients. Rather than saving separate screenshots or downloading assets one by one, users can browse and manage different asset types from a single interface.
Keep everything in one library
Managing design references becomes difficult when files are spread across screenshots, downloads, bookmarks, and folders. AssetSnip includes a built-in library where captured assets can be stored and organized for future use.
Users can organize assets into folders, add tags, and search saved items whenever they need them. Keeping colors, graphics, typography references, and media assets in one place makes research easier to manage and reduces the need to revisit the same websites repeatedly.
If you are building a broader reference workflow, the guide to saving design inspiration from websites covers this use case in more depth.
Export for development
Once assets have been collected, they often need to be reused during development. AssetSnip provides multiple export options to support this workflow.
Users can export captured information as HTML, CSS, and design tokens. The platform also supports Tailwind-friendly output, React-style markup, and the ability to open exports directly in CodePen. Through Inspect Mode, users can review component structures, download HTML, and move more efficiently from research to implementation.
Generate and save SVG icons
AssetSnip also includes an AI Icon Generator that supports both Text to SVG and Image to SVG workflows. Users can describe an icon using a text prompt or upload a reference image to create a vector version.
Generated SVGs can be saved alongside captured website assets in the same library. This keeps custom icons, reference graphics, and extracted assets organized in a single location, making them easier to reuse across future projects.
![]()
Practical use cases
Website asset extraction can be useful in many design and development workflows. Different professionals use these references for research, planning, and implementation based on their project requirements.
Common use cases include:
- UI and UX designers: Build inspiration libraries and collect reusable design references such as colors, typography, icons, and interface patterns.
- Frontend developers: Study layouts, inspect visual elements, and export styling information for development workflows.
- Agencies and freelancers: Organize design research and maintain separate collections of assets for different client projects.
- Product development: Maintain organized collections of colors, typography, media assets, and reusable interface elements for ongoing website updates and design consistency.
Best practices for website design research
A simple and organized approach can make website research more useful and easier to manage over time. Following a few best practices helps keep references structured and ready for future projects.
- Capture actual design assets instead of relying only on screenshots.
- Organize references by project, category, or purpose.
- Save complete design systems, including colors, typography, media assets, and UI patterns.
- Maintain a reusable library that can be used across multiple projects.
- Export assets in formats that fit your design and development workflow.
- Respect asset licenses and copyright before reusing third-party images, icons, videos, or animations commercially.
Conclusion
Understanding a website design system goes beyond identifying colors and fonts. It involves capturing the visual and structural elements that make an interface consistent and reusable.
If you want a simpler way to collect, organize, and export website assets, AssetSnip brings these tasks together in a single workflow, helping you spend less time searching and more time building.
Sign up for AssetSnip, read the broader Introducing AssetSnip launch post, or compare limits on the pricing page.