Introduction
AI coding agents can generate interfaces in minutes, but they often miss the design details that make a product feel polished and consistent.
Without structured design context, even detailed prompts can produce generic results. AssetSnip solves this by generating a DESIGN.md that gives AI agents the design guidance they need.
In this tutorial, you'll build a landing page, improve it using the AssetSnip Extension, complete DESIGN.md from the Dashboard, and use downloaded project assets to create a more accurate implementation.
What is DESIGN.md?
AI coding agents are good at generating interfaces, but they often miss the reasoning behind a design system. Prompts can describe the desired outcome, but they rarely capture every design rule or remain consistent as a project grows.
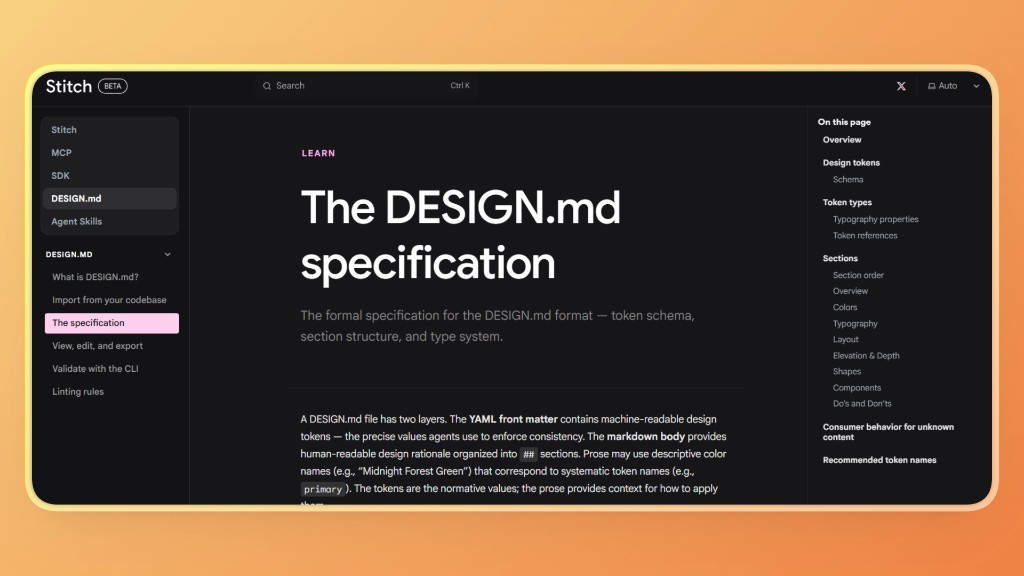
Google introduced DESIGN.md as an open, human-readable, and machine-readable specification that allows design systems to move across AI tools and coding agents. Instead of asking AI to infer design intent, developers can provide a structured document that defines the product's visual language.
This gives agents persistent design context, reduces inconsistency, and helps produce interfaces that better reflect a product's brand and design standards.
What information does DESIGN.md contain?
A DESIGN.md file combines structured design tokens with written design guidance. Together, they help AI understand both the design values and the reasoning behind them.
A typical DESIGN.md includes:
- Design tokens for reusable design values
- Colors that define the product's visual palette
- Typography including font families, sizes, weights, and text hierarchy
- Spacing scales used throughout layouts
- Border radius values for consistent component shapes
- Component definitions that describe reusable UI patterns
- Design rationale explaining how and when design decisions should be applied
- Brand guidelines that communicate the overall visual style and user experience goals
This combination of structured tokens and design guidance enables AI coding agents to generate interfaces that are more consistent, reusable, and aligned with the intended design system.
Learn more about the DESIGN.md specification
AssetSnip DESIGN.md
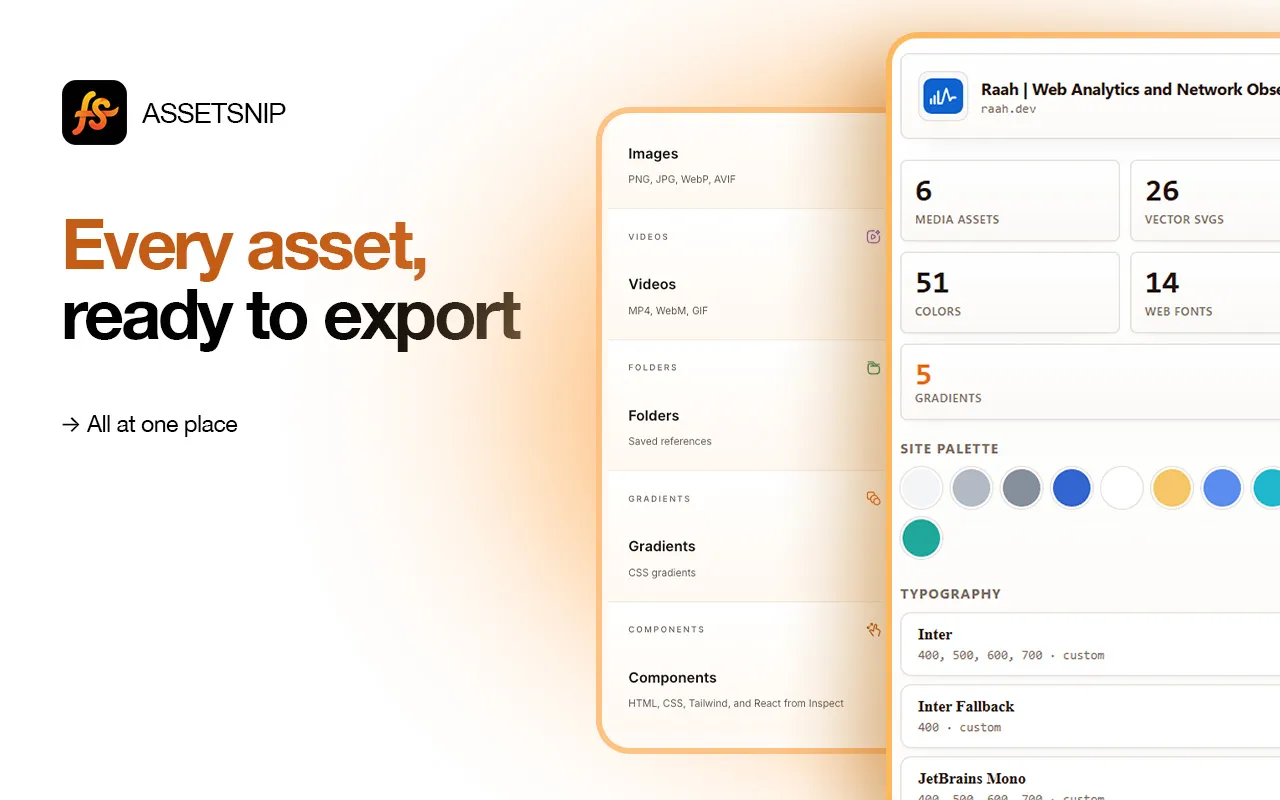
AssetSnip simplifies the process of creating a DESIGN.md by generating an implementation guide from real websites and the assets you collect.
Instead of documenting a design system manually, you can generate an agent-ready DESIGN.md that AI coding agents can use to build interfaces with greater visual consistency. AssetSnip provides two ways to generate a DESIGN.md, depending on your workflow.
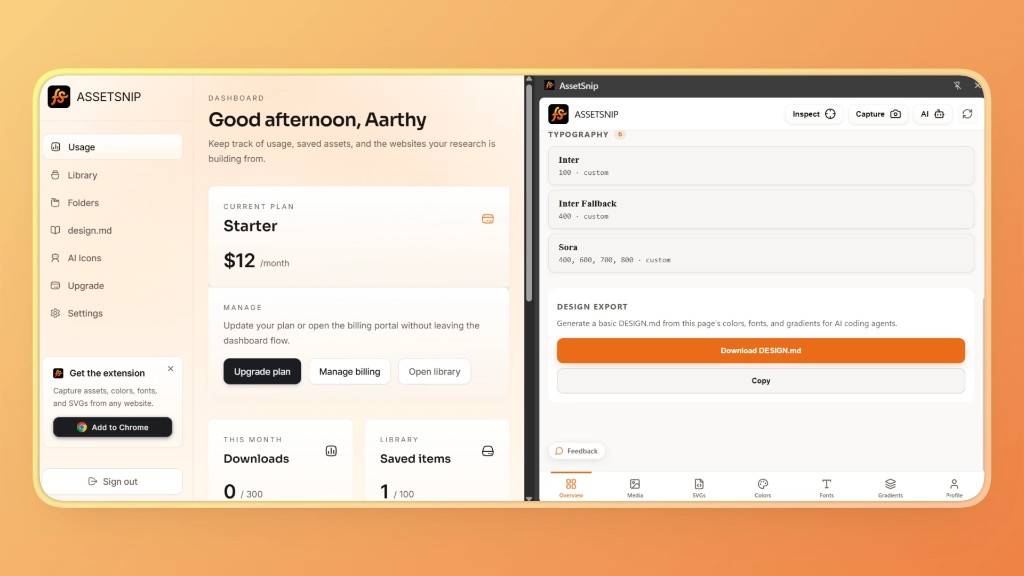
Method 1: Generate DESIGN.md from the Chrome Extension
- Open any website and launch the AssetSnip Chrome Extension.
- Generate a lightweight DESIGN.md directly from the inspected webpage.
- Capture the page's essential design characteristics for quick implementation.
- Copy the generated DESIGN.md and provide it to your AI coding agent.
- Best suited for rapid prototyping, design exploration, and updating existing interfaces.
Method 2: Generate DESIGN.md from the Dashboard
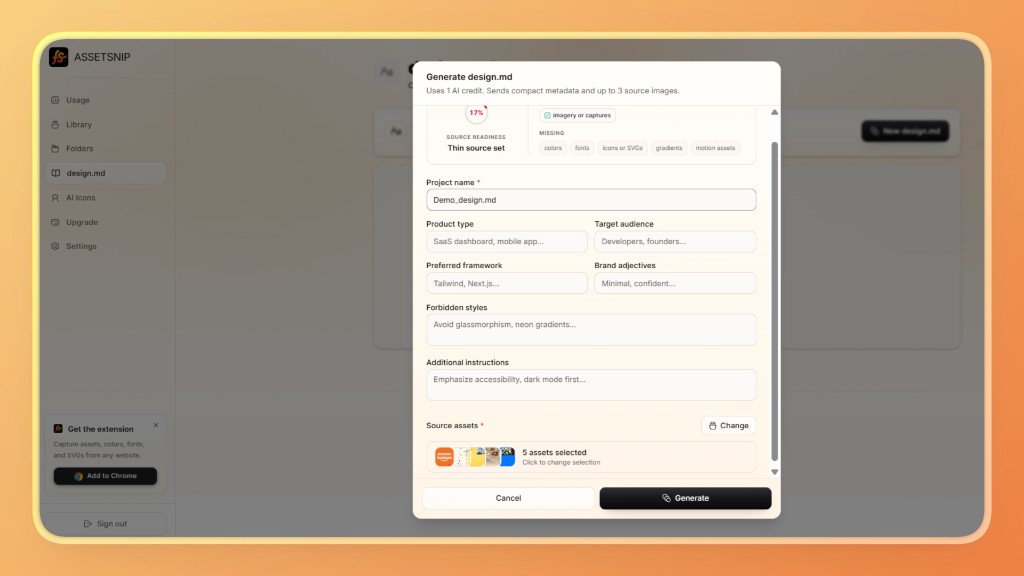
- Create a project folder in the AssetSnip Dashboard.
- Organize the assets collected in your AssetSnip Library inside the folder.
- Generate a complete DESIGN.md from the project folder.
- The generated implementation guide follows Google's DESIGN.md specification.
- Best suited for complete projects that require richer design context and consistent implementation across multiple pages and components.
Build a Landing Page with AssetSnip DESIGN.md
In this section, you'll compare how an AI coding agent builds the same landing page across four different scenarios.
You'll start with a standard AI-generated interface, then progressively improve it using the AssetSnip Extension DESIGN.md, the complete Dashboard DESIGN.md, and finally with both files.
Step 1: Generate a Landing Page Without DESIGN.md
To establish a baseline, start by generating a landing page using an AI coding agent without providing any design guidance.
For this tutorial, we'll use GitHub Copilot (Model: Anthropic Claude Haiku 4.5) in Agent mode, although the same workflow can be followed with other AI coding agents.
Create a detailed prompt that describes the product and the required sections, including a navigation bar, hero section, feature cards, testimonials, pricing, FAQ, call-to-action, and footer. Avoid including any design references or visual instructions.
The prompt used for this article:
Build a modern, production-ready landing page for an AI-powered developer productivity platform called CodePilot AI.

The landing page should include:

A responsive navigation bar with logo and navigation links
A hero section with a compelling headline, supporting text, primary and secondary call-to-action buttons, and a product mockup illustration
A "Trusted by" section with company logos
A features section with six feature cards and relevant icons
A "How It Works" section with three simple steps
A testimonials section with three customer reviews including names, roles, and profile images
A pricing section with three pricing plans
A frequently asked questions (FAQ) section
A final call-to-action section
A professional footer with navigation links, social links, copyright, and newsletter signup

Use React, Tailwind CSS, and modern component-based architecture.

Focus on clean structure, accessibility, responsive design, smooth spacing, hover effects, and reusable components.

Do not copy any existing website. Create an original design based on common SaaS landing page patterns.
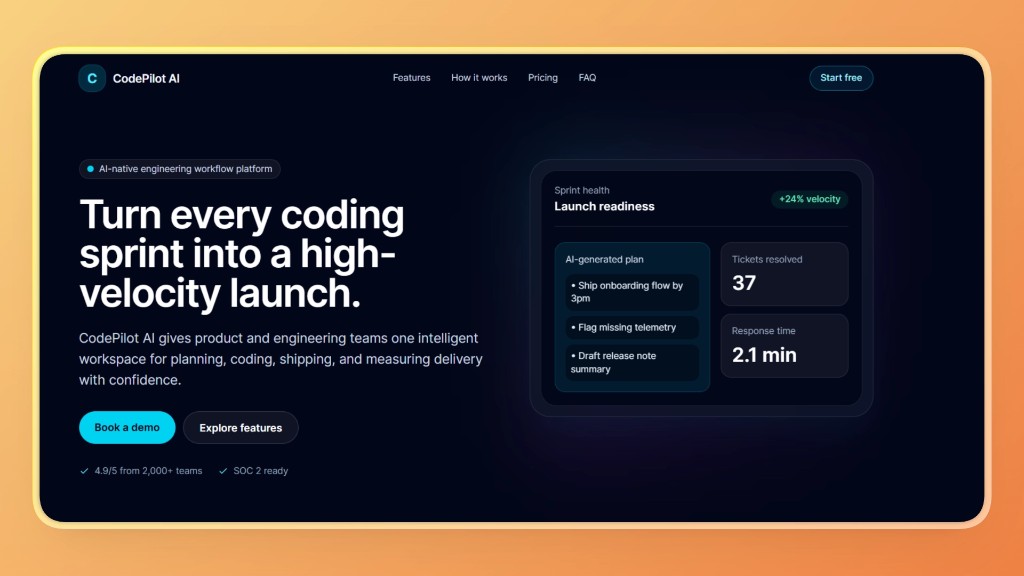
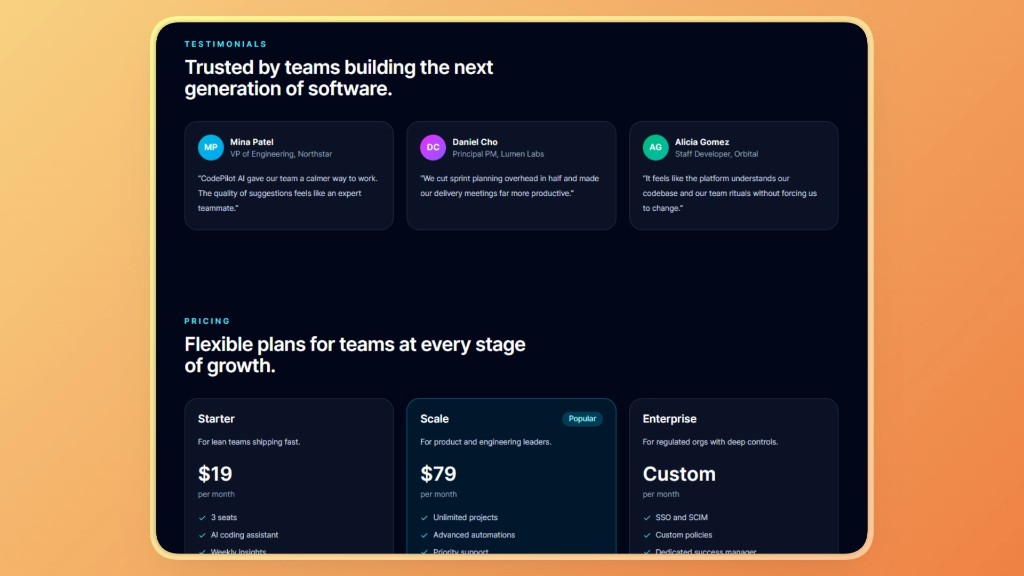
Output Screenshots - Version #1
Step 2: Generate a DESIGN.md Using the AssetSnip Extension
Next, generate a DESIGN.md from your design inspiration using the AssetSnip Chrome Extension.
Open the website you want to use as the visual reference, launch the AssetSnip Extension, and generate the implementation guide.
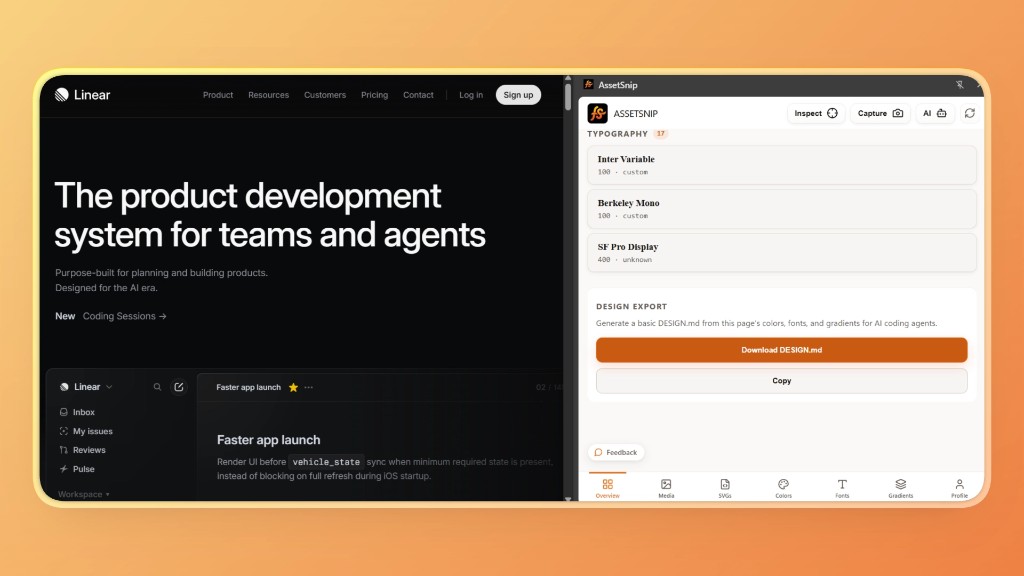
AssetSnip analyzes the inspected webpage and creates a lightweight DESIGN.md that captures its key design characteristics. Copy the generated DESIGN.md, as you'll use it to guide the AI coding agent in the next step.
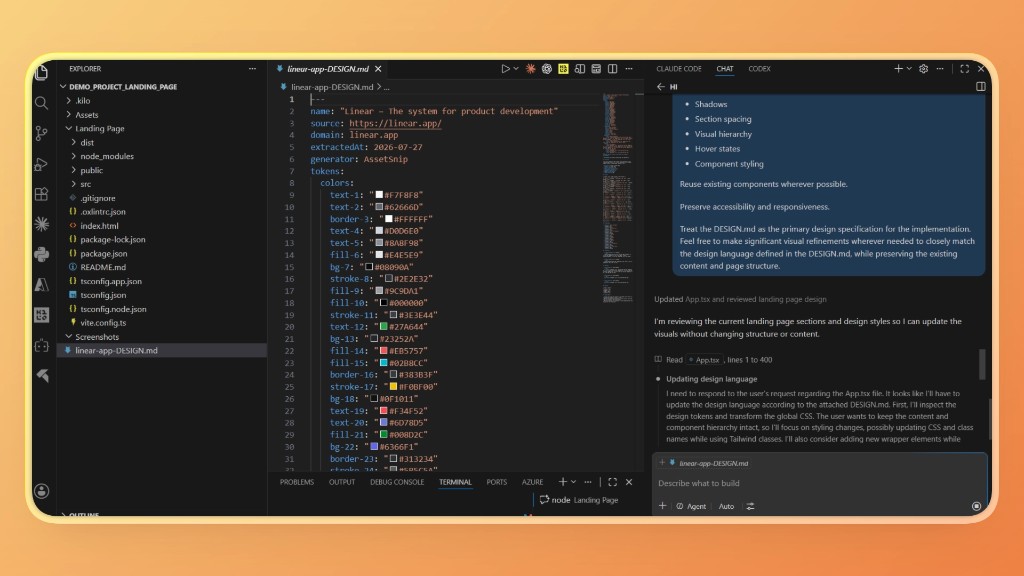
Step 3: Update the Landing Page Using the Lightweight Implementation Guide
Return to the same landing page generated in Step 1. Instead of creating a new project, provide the lightweight DESIGN.md to the AI coding agent and ask it to update the existing interface.
The content, page structure, and functionality should remain unchanged. The goal is to apply the design guidance from the DESIGN.md across typography, colors, spacing, buttons, cards, and other visual elements while preserving the original implementation.
After the update, compare the new version with the baseline and observe how the overall design language changes.
The prompt used for this step:
Update the existing landing page using the attached DESIGN.md.

Do not rebuild the page or change its content, structure, or functionality.

Instead, modify the existing implementation so it follows the design guidance defined in the DESIGN.md.

Update the visual presentation wherever applicable, including:

Color palette
Typography
Layout and spacing
Border radius
Buttons
Cards
Icons
Visual hierarchy
Component styling
Design consistency

Preserve all existing sections, responsiveness, accessibility, and functionality. Use the DESIGN.md as the primary source of design guidance.
Output Screenshots #Version 2
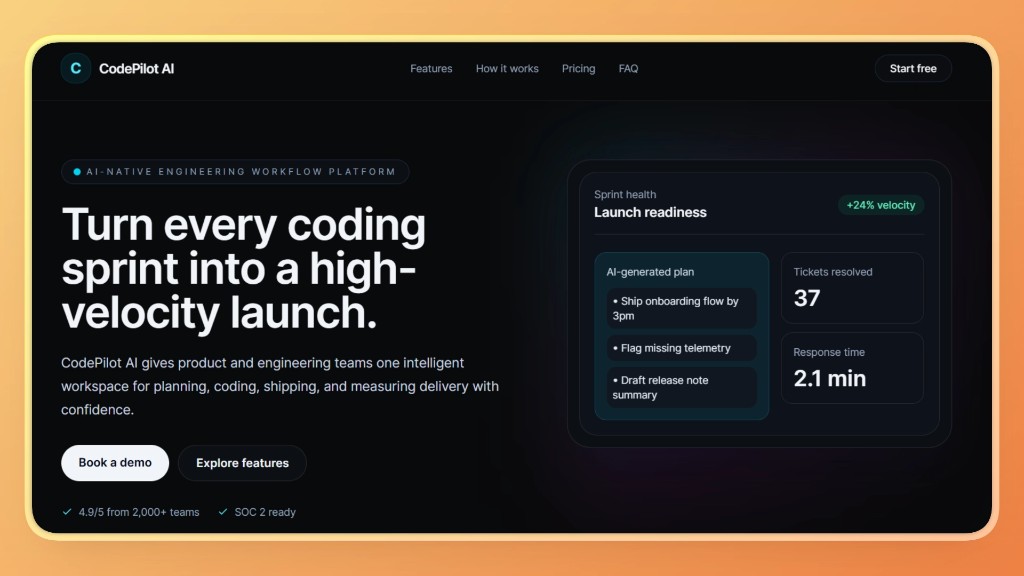
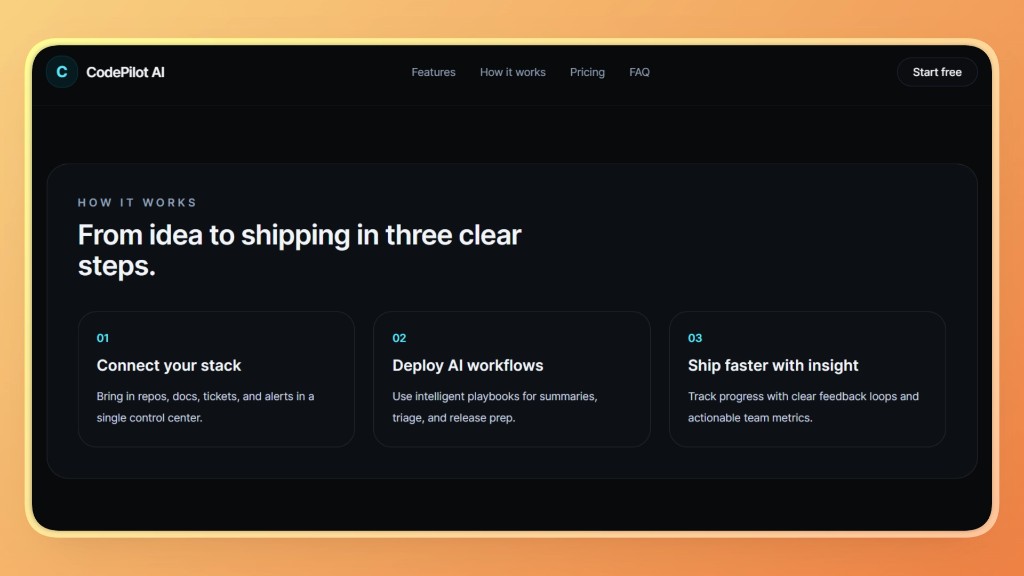
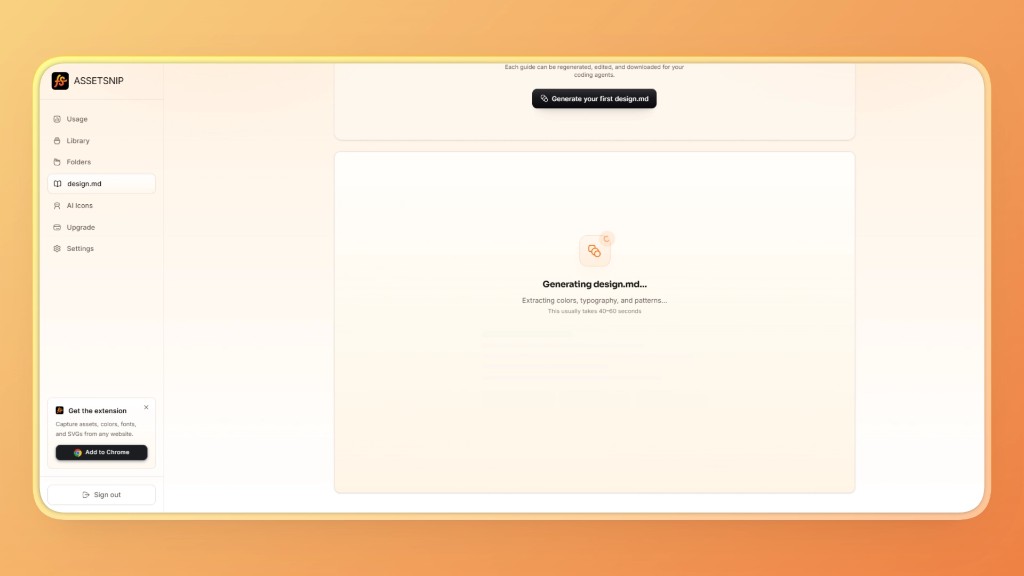
Step 4: Generate a Complete DESIGN.md from the AssetSnip Dashboard
The Dashboard workflow generates a more comprehensive implementation guide using the assets collected during your design research.
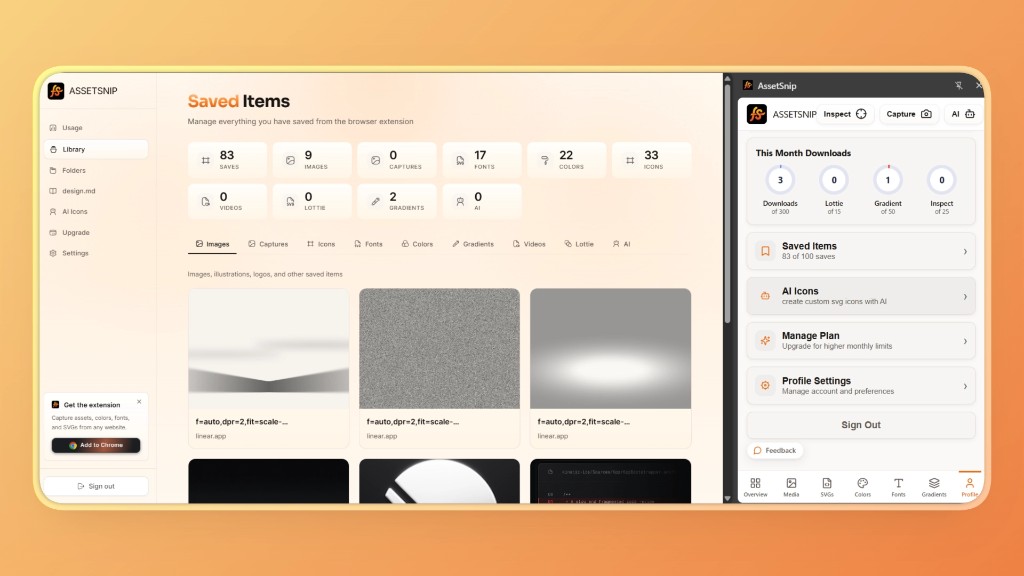
Start by creating a new project folder in the AssetSnip Dashboard. Move the extracted assets from your Library into the folder, then generate a DESIGN.md from that project. Unlike the Extension workflow, this version is created from the organized project assets and follows Google's DESIGN.md specification more comprehensively.
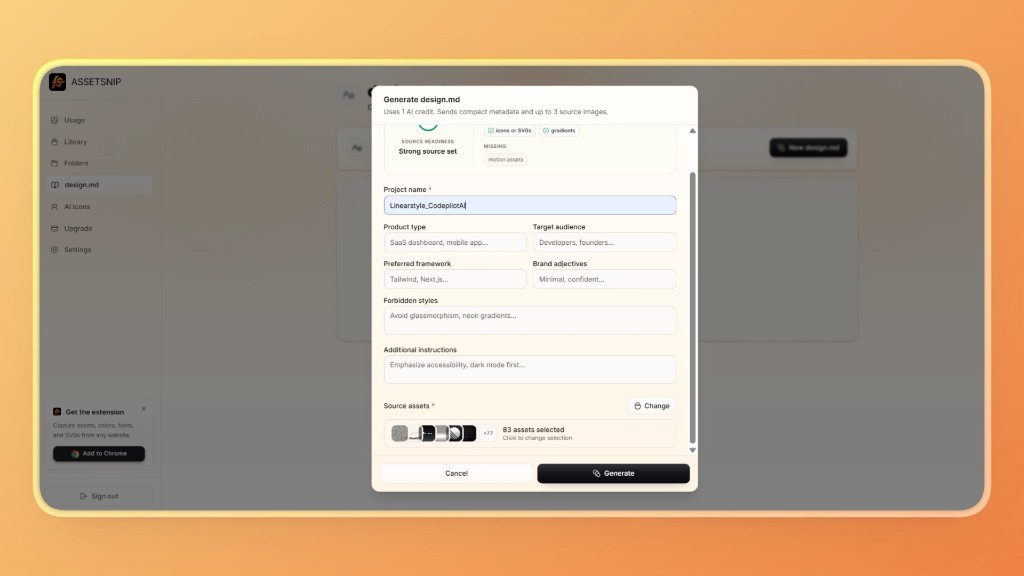
Download the generated DESIGN.md for use in the next step.
Step 5: Improve the Same Landing Page Using the DESIGN.md from Dashboard
Using the same landing page, replace the lightweight DESIGN.md with the complete DESIGN.md and ask the AI coding agent to update the interface again.
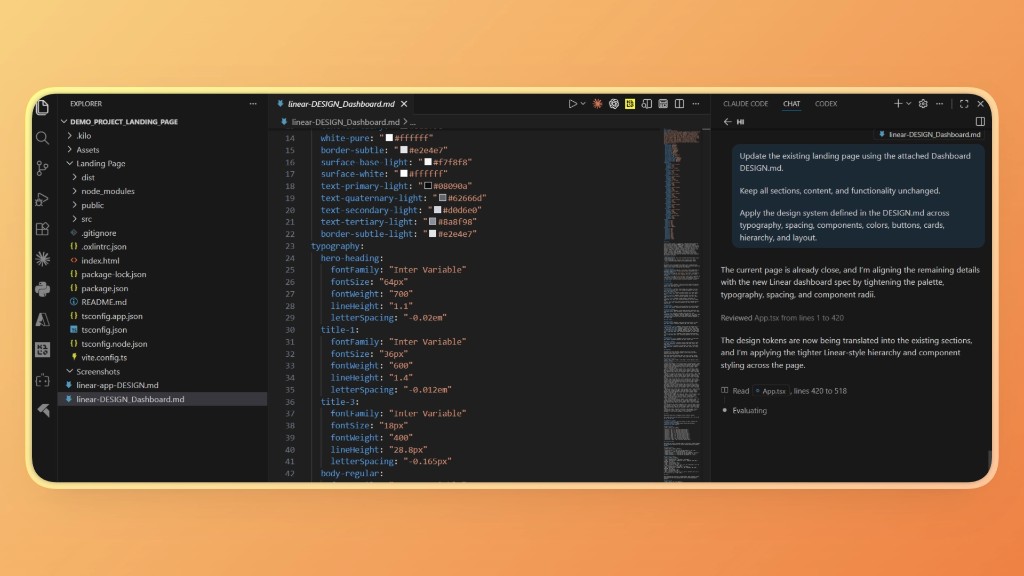
Since the Dashboard version contains more comprehensive design guidance, the coding agent has additional context for styling components consistently across the entire page.
Compare this version with the previous Extension-based lightweight implementation to identify the additional improvements introduced by the complete implementation guide.
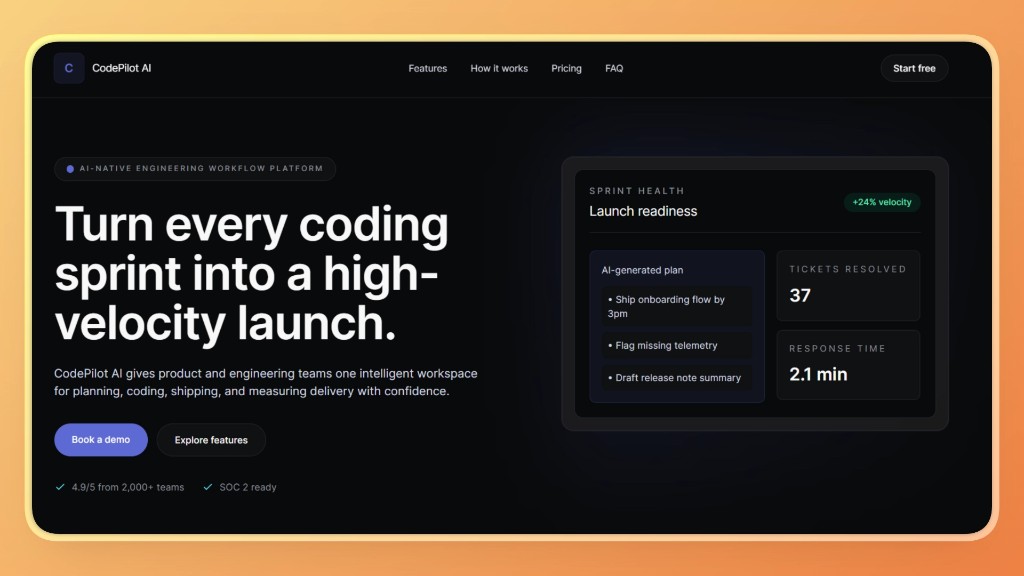
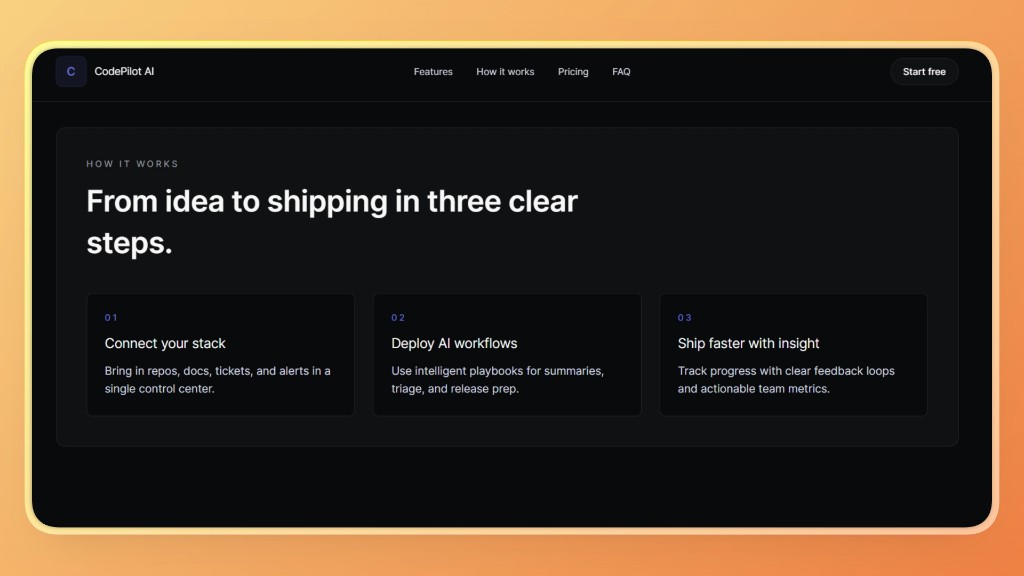
Output Screenshots #Version 3
Step 6: Add Project Assets Along with DESIGN.md
For the final workflow, download the project assets from the AssetSnip Dashboard as a ZIP file and extract them into your project.
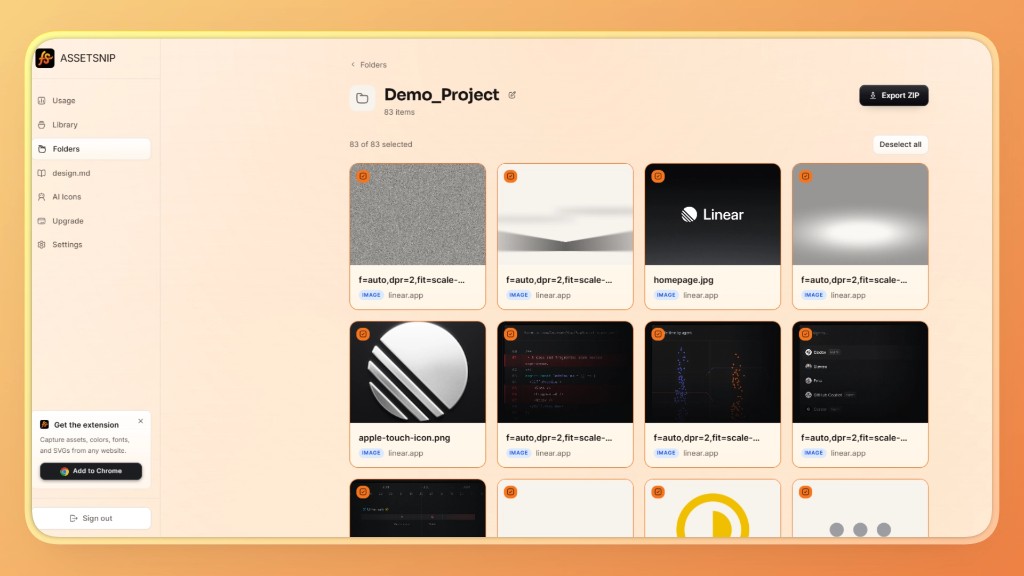
Keep the complete DESIGN.md from the dashboard alongside the downloaded assets and provide both to the AI coding agent. The implementation guide defines how the interface should be built, while the downloaded assets provide the actual design resources, such as icons, SVGs, images, and other reusable elements.
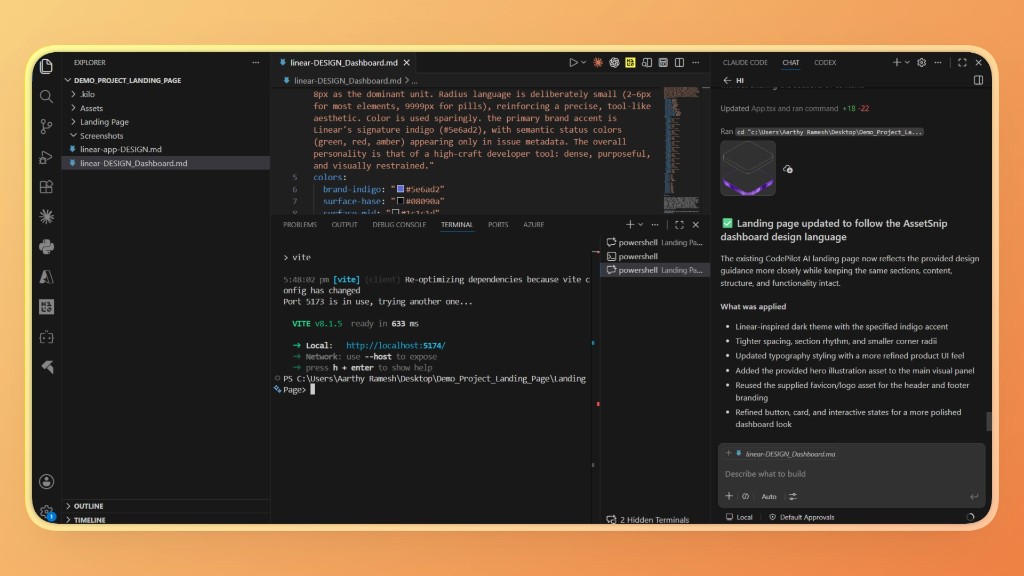
Ask the coding agent to update the existing landing page using both the DESIGN.md and the downloaded assets. This gives the model richer implementation context and enables a closer match to the original design language.
The prompt used for this step:
The project now contains two additional resources:

1. A complete DESIGN.md generated by AssetSnip.
2. An "assets" folder containing the extracted project assets downloaded from AssetSnip, including images, icons, SVGs, logos, and other design resources.

Update the existing CodePilot AI landing page using both the complete DESIGN.md and the assets folder.

Treat the DESIGN.md as the primary implementation guide and use the actual files from the assets folder wherever applicable instead of creating placeholders or generating new graphics.

Keep the existing content, page structure, and functionality unchanged. Do not create a new landing page or add new sections.

Apply the design guidance consistently across the interface, including typography, colors, spacing, layout, buttons, cards, icons, visual hierarchy, border radius, shadows, and interactive states.

When suitable assets are available in the assets folder, import and use those exact files in the implementation. Replace placeholder illustrations, logos, icons, and images with the provided project assets.

Ensure the implementation is responsive, accessible, and closely matches the design language defined in the DESIGN.md while making full use of the provided assets.
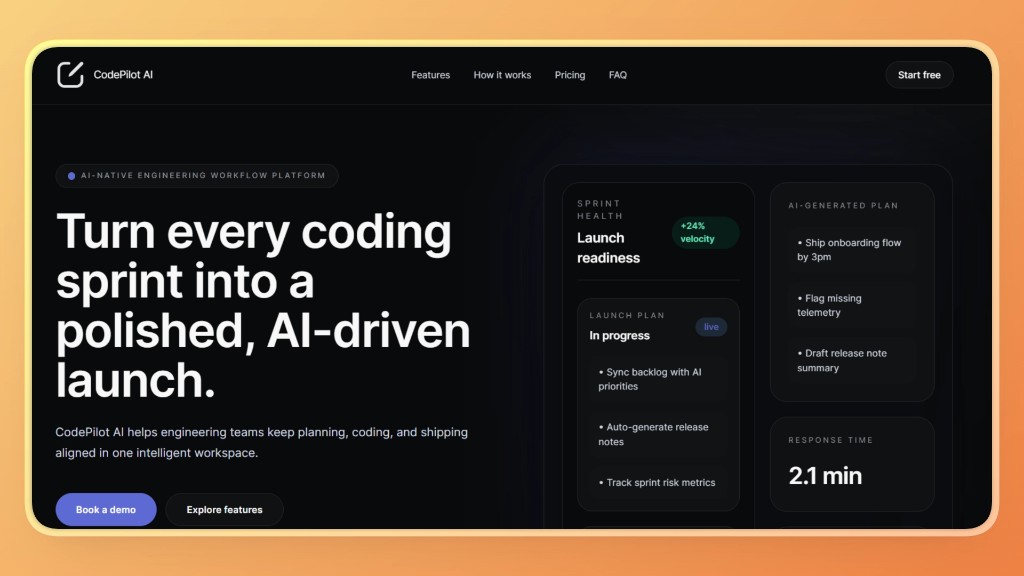
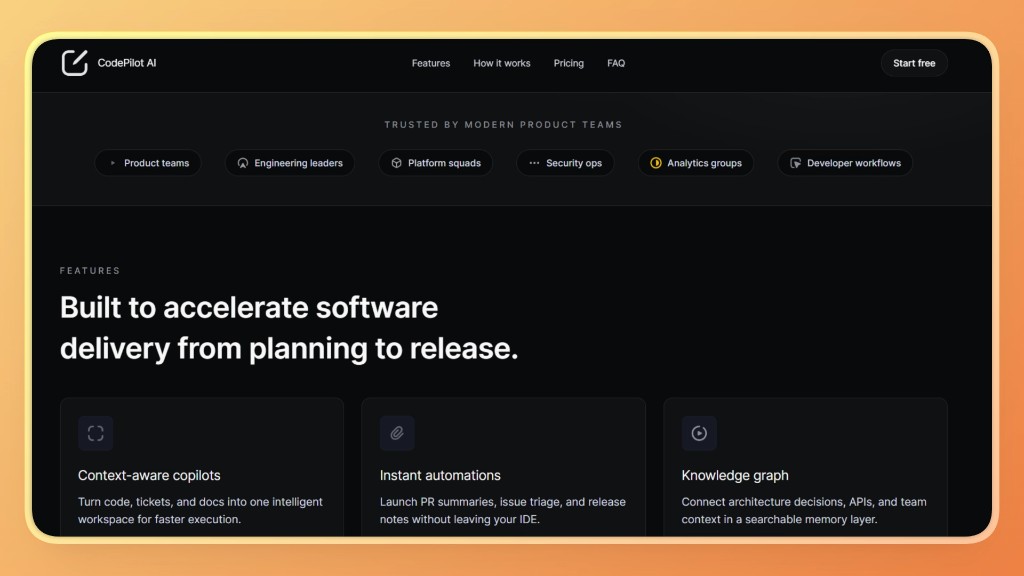
Output Screenshots - Version #4
Final Comparison
| Version | Design Context | Expected Observation |
|---|---|---|
| Version 1 | No DESIGN.md | AI generates a functional interface using its default design decisions. |
| Version 2 | Lightweight implementation guide | Visual styling becomes more consistent with the inspiration website through improved typography, spacing, colors, and component styling. |
| Version 3 | Complete DESIGN.md | The interface reflects a more complete design system with stronger consistency across layouts, components, and visual hierarchy. |
| Version 4 | Complete DESIGN.md + Project assets | The implementation makes use of both the design guidance and the actual project assets, resulting in the closest representation of the intended design language. |
Conclusion
AI coding agents generate better interfaces when they have structured design context instead of relying on prompts alone. Use the AssetSnip Extension for quick design extraction and rapid prototyping.
Use the Dashboard to generate a complete implementation guide for larger projects. Combining the Dashboard-generated DESIGN.md with downloaded project assets provides the richest context, helping AI produce more consistent and accurate implementations.
Ready to give your AI coding agent better design context?
Try AssetSnip to generate a DESIGN.md from your favorite websites and see how it improves your next AI-generated interface.